
When it comes to preparing for emergencies or long-term survival situations, having a reliable and well-stocked food supply is crucial. One effective way to ensure you have enough food to sustain yourself and your family is by creating DIY survival food buckets. These sturdy, airtight containers can hold a variety of nutrient-packed foods that will last for years when stored properly. In this step-by-step guide, I will walk you through the process of creating your own DIY survival food buckets.
Step 1: Gather Your Supplies
The first step in creating your DIY survival food buckets is to gather all the necessary supplies. Here’s what you will need:
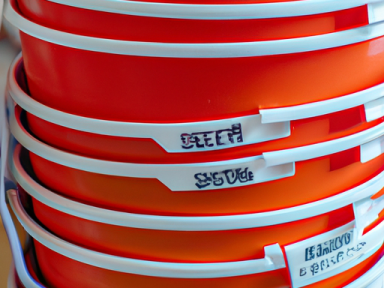
- Airtight buckets with sturdy lids
- Mylar bags
- Oxygen absorbers
- Food-grade plastic containers
- Nutrient-packed foods
- Measuring cups and spoons
- A heat sealer or iron
- Tape or labels for labeling the buckets
Step 2: Choose the Right Foods
When selecting foods for your survival food buckets, it’s important to choose items that are nutrient-dense and have a long shelf life. Consider foods like:
- Dried beans
- Rice
- Pasta
- Oats
- Dehydrated fruits and vegetables
- Dried meat or jerky
- Seeds and nuts
- Powdered milk
- Sugar or honey
These foods are not only packed with essential nutrients but can also provide the energy and sustenance needed during trying times.
Step 3: Prepare Your Foods
Before you start packaging your foods, it’s important to properly prepare them to ensure long-term storage. Here are some tips:
- Remove any moisture or excess air from the packaging to prevent spoilage.
- Use oxygen absorbers to eliminate oxygen, which can cause food to deteriorate.
- Label each package with the contents and the date of packaging.
- Store foods in food-grade plastic containers to protect them from pests and moisture.
Step 4: Package and Seal
Now that your foods are prepared, it’s time to package them in your Mylar bags and seal them properly. Here’s how:
- Place the prepared foods into the Mylar bags, leaving some space for the oxygen absorbers.
- Add the required number of oxygen absorbers to each bag, following the instructions provided.
- Seal the bags tightly using a heat sealer or by ironing the opening shut.
- Place the sealed bags into the airtight buckets, ensuring they fit snugly and there is no excess air inside.
Step 5: Store and Rotate
Once your DIY survival food buckets are ready, it’s important to store them in a cool, dry place away from sunlight. Regularly check the buckets for any signs of damage or pests. Additionally, make sure to rotate your food supply every few years to ensure freshness.
By following these steps and taking the time to properly prepare your survival food buckets, you can have peace of mind knowing that you and your loved ones are well-prepared for any emergency or survival situation. Remember, it’s always better to be safe than sorry.

GIPHY App Key not set. Please check settings