
DIY Survival Energy Bars: A Compact and Durable Food Source
In times of crisis, having a reliable source of energy can be the difference between survival and succumbing to the chaos. When traditional food sources become scarce or inaccessible, DIY survival energy bars can provide the sustenance needed to keep going.
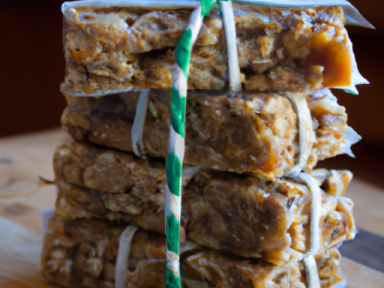
These homemade energy bars are not only compact and durable but also packed with essential nutrients to keep your body fueled in challenging situations. By making them yourself, you have control over the ingredients, ensuring that you are consuming healthy and high-quality food.
Why Should You Make Your Own Survival Energy Bars?
Commercially available survival bars are a convenient option, but they often come at a high price and may contain preservatives, artificial flavors, and unhealthy additives. By making your own energy bars, you can choose ingredients that suit your dietary preferences and needs.
Moreover, store-bought bars might not sustain you for long periods, and their compact size may come at the cost of taste and variety. By creating your own bars, you can customize the flavors and textures to your liking, ensuring that you have a reliable and enjoyable food source that will keep you going.
Ingredients You’ll Need
- 2 cups of rolled oats
- 1 cup of nuts or seeds (such as almonds, walnuts, or pumpkin seeds)
- 1 cup of dried fruits (such as dates, raisins, or cranberries)
- 1/2 cup of nut butter (such as peanut or almond butter)
- 1/2 cup of honey or maple syrup
- 1 teaspoon of vanilla extract
- Optional add-ins: chocolate chips, coconut flakes, chia seeds
Step-by-Step Instructions
- In a large mixing bowl, combine the rolled oats, nuts or seeds, and dried fruits.
- In a small saucepan, heat the nut butter and honey/maple syrup over low heat until melted and well combined. Stir in the vanilla extract.
- Pour the nut butter mixture into the bowl with the dry ingredients. Mix well until everything is evenly coated.
- If desired, add any optional add-ins to the mixture and mix thoroughly.
- Line a baking dish with parchment paper and transfer the mixture into the dish. Use a spatula or your hands to press the mixture firmly and evenly into the dish.
- Place the dish in the refrigerator for at least 2 hours or until the mixture is firm and set.
- Remove the dish from the refrigerator and cut the mixture into bars of your preferred size.
- Individually wrap the bars in foil or store them in an airtight container for future use.
Why DIY Survival Energy Bars Are a Must-Have
Being prepared for unexpected situations is crucial for your survival. DIY survival energy bars offer several advantages:
- Long Shelf Life: These bars can last for several weeks, providing you with a reliable source of energy when needed.
- Portability: The compact size of these bars allows for easy storage and transportation, making them ideal for bug-out bags or emergency kits.
- Nutritional Value: Homemade energy bars can be packed with nutrients, including protein, fiber, and healthy fats, keeping your body nourished and energized.
- Cost-Effective: Making your own bars is a budget-friendly option compared to purchasing pre-packaged survival food.
Don’t wait for a crisis to strike before taking action. Start preparing for any eventuality by making your own DIY survival energy bars today. By doing so, you’ll have peace of mind knowing that you are equipped with a compact and durable food source to sustain you through challenging times.


GIPHY App Key not set. Please check settings